Dekorasi eksterior sebuah rumah adalah “pakaian” yang dikatakan orang-orang disambut. Bahkan bangunan tua, yang kayunya telah menjadi gelap atau lapisan antar batanya berubah bentuk, dapat terlihat mengesankan jika Anda menjaga penampilannya dan mengganti bahan finishing tepat waktu. Seringkali, untuk memperbarui tampilan rumah, menjadikannya beberapa dekade lebih muda, yang perlu Anda lakukan hanyalah menutupi atap pelana dengan pelapis dinding. Cara termudah dan paling murah untuk melakukannya sendiri adalah dengan menggunakan pelapis dinding DIY.
Jenis berpihak
Berpihak disebut bahan finishing, yang terlihat seperti elemen terpisah, panel. Dinding rumah yang dilapisi pelapis dinding secara visual tidak berbeda dengan papan. Setiap modul dilengkapi sepanjang panjangnya dengan kait jepret dan tepi berlubang untuk pengencang. Ukuran panel berbeda dan bergantung pada kemampuan pabrikan, paling sering lebarnya 100-300 mm, panjang hingga 6 m Ini adalah bahan yang sangat tahan lama, berkat kualitas finishing atapnya. atap pelana tidak terkena kelembapan, tidak memerlukan perawatan dengan cat dan pernis, serta tahan hingga 50 tahun. Jenis pelapis dinding berikut tersedia di toko konstruksi:
- vinil. Panel yang terbuat dari polivinil klorida merupakan elemen tunggal yang dibuat secara monolitik. Pelapis dinding vinil ramah lingkungan, tahan terhadap perubahan suhu, tidak terbakar dan memiliki potensi dekoratif yang luas karena variasi warna dan tekstur. Finishing atap pelana dan pasang surut atap dengan panel vinil memiliki biaya rendah dan dapat dilakukan secara mandiri.
Paling sering, pelapis dinding vinil yang terjangkau digunakan sebagai bahan finishing untuk atap pelana, yang pekerjaan pemasangannya dapat dilakukan dengan tangan. Harap dicatat bahwa pelapis dinding berkualitas rendah menjadi rapuh dan rapuh dalam cuaca dingin, jadi ukur dan potong sesuai dengan itu periode musim dingin lebih baik di ruangan berpemanas.
Metode instalasi
Sebelum menutupi atap pelana dengan pelapis dinding, Anda perlu memutuskan metode pemasangannya pada atap pelana. Finishing terjadi dalam tiga metode:
- Tanpa bingkai. Ini adalah cara paling sederhana yang biayanya tidak akan membebani pemilik rumah. Ini terdiri dari pemasangan panel pada profil logam tanpa membuat bingkai. Hasil akhir ini hanya cocok untuk ruang atap loteng yang tidak dipanaskan, karena tidak memungkinkan penggunaan bahan insulasi gambut. Namun, metode pemasangan ini tidak bisa disebut ideal, karena jika bahan selubung atap pelana aus, dindingnya akan berubah bentuk.
Sebagian besar produsen pelapis dinding menunjukkan bahwa pelapis tersebut dirancang untuk digunakan dalam struktur dengan rangka logam, karena selubung kayu mengubah konfigurasi seiring dengan perubahan kadar airnya, merusak bentuk pelapis dinding dan mengganggu integritas selubung.
Perintah kerja
Pekerjaan pemasangan sendiri pada atap pelana diawali dengan pemasangan scaffolding atau pemasangan tangga yang dapat diandalkan, yang tingginya cukup untuk mencapai tempat kerja. Harap dicatat bahwa semakin nyaman perasaan Anda pada perancah, semakin cepat dan lebih baik pelapisan akan dilakukan. Kelongsong atap pelana dilakukan dengan urutan sebagai berikut:
- Langkah pertama adalah mempersiapkan dinding untuk pemasangan kusen. Untuk melakukan ini, Anda perlu menghilangkan bagian yang menonjol dan menutup retakan menggunakan busa tahan lembab.
Tempat di mana jendela dimasukkan dibingkai menggunakan khusus profil jendela agar lapisannya terlihat rapi. Cara lain untuk menyelesaikan struktur jendela dengan indah adalah dengan menutupi sambungan dengan sudut plastik.
Finisher sering kali melapisi atap pelana dengan pelapis dinding secara horizontal, tetapi terkadang jenis finishing vertikal lebih umum, karena secara tradisional dinding berada di antara lereng. atap pelana dilengkapi dengan cara ini.
Menutupi atap pelana dengan memihak adalah cara murah untuk memperbaruinya sendiri penampilan struktur, memperpanjang umur layanannya dan melupakan pengecatan musiman pada dinding rumah.
Menyelesaikan pedimen dengan memihak sendiri - metode pemasangan
Cara menyelesaikan atap pelana dengan pelapis dinding dengan benar, jenis panel apa yang bisa digunakan. Panduan memilih jenis dan memasang bingkai dengan tangan Anda sendiri.
Cara menyelesaikan pedimen dengan memihak.
Menyelesaikan atap pelana dengan memihak dapat dilakukan tidak hanya pada saat melapisi seluruh rumah, tetapi juga misalnya pada saat membangun atap rumah bata atau lainnya, dilapisi dengan batu bata (balok, kayu, rangka). Menghadapi sisi atap pelana dengan pasang surut terlihat sangat indah. Inilah kasus yang akan kami pertimbangkan.
Menyelesaikan atap pelana dengan memihak- pada prinsipnya, masalahnya tidak rumit dan Anda bisa melakukannya sendiri. Lebih baik melakukan pekerjaan bersama-sama: yang satu bekerja di atas dan terlibat langsung dalam selubung, yang kedua di bawah memotong bahan dan memberinya makan.
Sangat penting untuk memasang perancah yang andal di awal pekerjaan. Semakin percaya diri Anda menggunakannya, semakin mudah cara kerjanya. Tentu saja, bagus bila memungkinkan untuk menggunakan perancah siap pakai yang sudah jadi (misalnya, bingkai), tetapi jika tidak tersedia, Anda harus menunjukkan imajinasi Anda dan membuat perancah dari papan yang ada.
Saya ingin segera menunjukkan hal itu dalam contoh ini Kami melapisi atap pelana dari atap yang tidak berinsulasi, yang dibuat seperti loteng yang dingin. Saat menyelesaikan pedimen atap loteng, kamar yang dipanaskan memiliki beberapa perbedaan, yang pasti akan saya sebutkan.
Jadi, kita punya rumah yang selanjutnya akan dilapisi dengan batu bata. Atapnya hampir siap. Atapnya terbuat dari ubin logam. Atap pelana yang menjorok dan cornice ditutupi dengan pelapis dinding hanya pada sisi ujungnya. Bagian atap pelana yang berkedip belum ditutup dengan ubin logam.
Pertama-tama, kami memasang apa yang disebut strip penyangga di dasar pedimen. Untuk melakukan ini, kami menempatkan selembar ubin logam di bawahnya dan, setelah sebelumnya memotong sudut rak paling atas dengan gunting logam, kencangkan strip dengan sekrup sadap sendiri (misalnya, dengan mesin cuci tekan). 3 buah per batang sudah cukup. Kemudian kami memindahkan lembaran ubin logam dan kencangkan strip berikutnya dengan sedikit tumpang tindih (2-3 cm). Jadi sampai akhir.
Lembaran ubin logam tidak langsung kami pasang, karena akan mengganggu pekerjaan selanjutnya. Selama pasang surut atap pelana tidak ditutup dengan besi, Anda dapat memasang perancah padanya, Anda dapat berdiri di atasnya, dan pada akhirnya, Anda dapat terluka dengan ujung ubin logam yang tajam.
Saya akan membuat penyimpangan kecil. Seperti yang telah saya sebutkan, ruang loteng dalam contoh ini tidak dipanaskan, jadi kami menutupi dinding langsung di papan tanpa bingkai dan tanpa menggunakan film (membran) tahan angin yang dapat menyerap uap.
Langkah selanjutnya adalah memasang sudut interior di dasar atap pelana yang menjorok. Setelah memotong elemen pertama secara miring (lihat foto), kami mengencangkannya dengan sekrup sadap sendiri. Untuk aturan dasar pemasangan elemen pelapis dinding dan panelnya sendiri, baca artikel “Pemasangan perlengkapan dan panel atau pelapisan rumah dengan pelapis dinding (Bagian 2)”.
Satu sudut bagian dalam (panjangnya 3 meter) biasanya tidak cukup untuk seluruh panjang atap pelana yang menjorok. Cara membuat sambungan antar elemen ditunjukkan pada foto di bawah ini. Secara berurutan dari kiri ke kanan ditampilkan: 1) dan 2) - cara memotong dan menyambung sudut dalam yang berdekatan, 3) 4) dan 5) - cara memotong dan menyambung sudut dalam di bagian atas pedimen.
Selanjutnya, Anda bisa langsung menutupi atap pelana yang menjorok dengan pelapis dinding. Selain itu, saya ingin mencatat bahwa tidak perlu menggunakan soffit (pelapis dinding berlubang) dalam kasus ini. Untuk memberi ventilasi pada ruang di bawah atap, lampu sorot sebaiknya digunakan saat menyelesaikan bagian atap dari bawah. Praktis tidak ada sirkulasi udara melalui atap pelana yang menjorok di bawah atap.
Saya biasanya mengukur panjang panel berpihak yang diperlukan seperti ini: masukkan ujung pita pengukur ke sudut dalam dan ukur jarak ke tepi luar sudut luar. Tambahkan 5-10 mm ke jarak ini. Pemasangan pelapis dinding lebih mudah dengan terlebih dahulu memasukkan salah satu ujungnya ke sudut luar, lalu sedikit menekuk panel untuk memasukkan ujung lainnya ke sudut dalam. Urutan ini disebabkan karena sudut luar biasanya memiliki alur yang lebih dalam daripada sudut dalam.
Jangan lupa bahwa di musim dingin, pelapis dinding menjadi rapuh dan menutupi bagian atap dengan itu menjadi cukup sulit. Agar tidak pecah, panel harus disimpan dan dipotong di tempat yang hangat.
Jadi, kami memotong panel pertama pada sudut yang diperlukan dan mengamankannya, mengontrol posisinya menggunakan persegi 90°, menerapkannya, misalnya, ke sudut luar dan ke panel itu sendiri. Kemudian masukkan panel berikutnya, dll. ke atas.
Kadang-kadang bagian dari rel-H atau sudut bagian dalam dipasang di sambungan atas atap pelana yang menjorok. Kami biasanya tidak menaruh apa pun di sana. Kita tinggal membengkokkan panel paling atas dari salah satu overhang dan meletakkannya di overhang lainnya sejauh 2-3 cm agar celahnya tidak terlihat. Apa yang terjadi ditunjukkan pada foto di bawah ini...
Sekarang kita langsung beralih ke pedimen itu sendiri. Pertama kita instal profil awal. Anda dapat membelinya langsung di toko, atau Anda dapat melakukannya tanpanya. Misalnya, dalam hal ini kami memanfaatkan sisa limbah setelah menutupi ujung cornice dan atap pelana. Warnanya tidak penting. Kami cukup memotong semua yang tidak perlu dan hanya menyisakan kuncinya (lihat foto).
Anda perlu mengamankan profil awal agar nantinya panel pertama terpasang dengan bebas. Untuk melakukan ini, selama pemasangan, kita cukup menggunakan bagian mana saja dari dinding, menempatkan pipi di bawah profil awal (ini ditunjukkan langsung di foto).
Sekali lagi, saya ingin mencatat bahwa pemasangan jendela seperti itu hanya mungkin dilakukan jika kita memiliki ruang loteng yang dingin. Jika ruangan tersebut merupakan tempat tinggal dan berpemanas, jendela harus ditenggelamkan setidaknya sedalam 12-15 cm agar jendela tidak membeku dan kemiringan luar harus dibuat (ini diwajibkan oleh produsen jendela plastik). Dalam hal ini, profil dekat jendela digunakan sebagai pengganti profil J. Anda dapat melakukannya tanpa profil sama sekali: cukup buat lereng luar dan tutupi sambungan antara profil tersebut dan dinding dengan sudut plastik.
Jadi kami memotong uang tunai dengan sudut 45°, dan pada setiap sambungan sudut, profil bawah dibuat dengan lidah (sekitar 1 cm), dan profil atas tanpa lidah. Apa yang terjadi ditunjukkan pada foto di bawah ini...
Air surut jendela plastik tidak ditampilkan pada foto di atas. Sebaiknya pemasangannya dilakukan setelah pedimen selesai seluruhnya.
Langkah selanjutnya adalah pemasangan profil-H. Anda harus memilih sendiri lokasi pemasangannya, tergantung pada bentuk dan ukuran pedimen dan jendela. Anda perlu mencoba untuk memastikan bahwa sisa-sisanya lebih sedikit, dan agar terlihat layak.
Seperti yang saya katakan di artikel saya sebelumnya, kami tidak menyambung panel berpihak tanpa profil-H dan kami tidak menyarankan Anda melakukannya. Sambungan tersebut lama kelamaan akan tersumbat oleh kotoran dan akan terlihat jelas dalam beberapa tahun. Kelihatannya tidak bagus, secara halus.
Setelah semua elemen terpasang, kami melanjutkan ke pemasangan panel yang sebenarnya. Jadi, mereka perlu dipotong pada sudut tertentu.
Untuk menentukan sudut ini kita membuat template menggunakan dua buah panel seperti yang ditunjukkan pada foto. Lebih mudah untuk membuat dua templat sekaligus: satu di kiri, yang lain di kanan. Saya pikir proses pelapisan lebih lanjut pedimen secara umum sudah jelas.
Yang penting panelnya bisa bergerak bebas ke kiri dan ke kanan dalam jarak 1 cm, saya sudah membicarakan hal ini di artikel sebelumnya dan tidak akan mengulanginya.
Ketika semua panel dipasang, yang tersisa hanyalah mengencangkan lembaran ubin logam ke pasang surut atap pelana.
Pada dasarnya itu saja. Tentu saja, saya yakin beberapa pembuat melakukan beberapa hal secara berbeda dan dalam urutan yang berbeda. Saya baru saja berbicara tentang bagaimana kita melakukannya.
Jika Anda ingin melakukan pekerjaan itu sendiri, cobalah dan Anda akan berhasil. Semoga beruntung!
Menyelesaikan atap pelana dengan memihak
Instruksi bergambar terperinci untuk menyelesaikan atap pelana dengan pelapis dinding. Semua pekerjaan dijelaskan langkah demi langkah dan ditampilkan dalam foto.

Melapisi atap pelana dengan dinding - panduan yang mudah diakses dan terperinci untuk pemula
Menutupi pedimen dengan pelapis dinding, di satu sisi, merupakan tahapan penting dalam menyelesaikan fasad, namun di sisi lain, pekerjaan itu sendiri tidak mengandung operasi yang sangat rumit. Bahkan orang yang jauh dari dunia konstruksi pun dapat mengatasinya, Anda hanya perlu membiasakan diri dengan teknologinya terlebih dahulu. Oleh karena itu, saya sarankan Anda mempelajari proses ini secara detail dari awal hingga akhir.
Anda dapat melapisi atap pelana dengan pelapis dinding tanpa menggunakan bantuan spesialis
Teknologi kelongsong pedimen
Proses pelapisan pedimen dapat dibagi menjadi beberapa tahap:
Tahapan utama menutupi atap pelana dengan dinding
Saat menutupi rumah dengan pelapis dinding, pekerjaan sebaiknya dimulai dengan menyelesaikan atap pelana, terutama jika Anda tidak memilikinya perancah. Jika tidak, Anda berisiko merusak pelapis dinding di tangga.
Persiapan bahan
Hal pertama yang harus Anda lakukan adalah menghitung pelapis dinding atap pelana. Rumus perhitungannya tergantung pada bentuk pedimen. Paling sering, pedimen berbentuk segitiga, sehingga perhitungan dilakukan menggunakan rumus berikut - S = 0,5 * (tinggi pedimen, panjang alas pedimen). Nilai yang dihasilkan harus dikalikan dua, karena ada dua pedimen, dan tambahkan 5–10 persen margin ke dalamnya.
Rumus menghitung luas pedimen segitiga
Jika atapnya loteng dan pedimennya berbentuk trapesium yang disambung segitiga, maka perhitungannya dilakukan dengan rumus sebagai berikut - S = 0,5 * (alas trapesium bawah, alas segitiga atas) * tinggi dari pedimen. Seperti pada kasus sebelumnya, nilai yang dihasilkan harus digandakan, dan margin harus ditambahkan ke dalamnya.
Situs web toko besar biasanya memilikinya kalkulator daring, yang memungkinkan Anda menghitung dengan cepat dan akurat jumlah yang dibutuhkan papan. Untuk melakukan ini, Anda hanya perlu menunjukkan dimensi atap pelana.
Selain pelapis dinding itu sendiri, kita membutuhkan bahan-bahan berikut:
- Profil logam dan gantungan untuk merakit rangka (dapat diganti dengan balok kayu dengan bagian 50x50 cm),
- Mulai profil,
- profil J,
- Piring tetes,
- Profil-H untuk menyambung panel.
Strip starter untuk pelapis dinding vinil
Jika ruang loteng akan digunakan sebagai tempat tinggal, atap pelana juga perlu diisolasi. Dalam hal ini, Anda membutuhkan bahan-bahan berikut:
- Papan isolasi termal,
- Film tahan angin dan lembab.
Mempersiapkan atap pelana
Sebelum Anda mulai memasang selubung, Anda perlu menyiapkan pedimen:
- Jika pedimen memiliki elemen gantung, misalnya antena, maka harus dibongkar,
- Jika ada papan yang busuk, pastikan untuk menggantinya.
Jika Anda akan memihak rumah kayu, segera rawat dindingnya.
Perakitan bingkai
Sebagai contoh, mari kita lihat cara merakit rangka logam. Biasanya, itu dirakit dari profil CD biasa dan suspensi berbentuk U.
Petunjuk langkah demi langkah untuk melakukan pekerjaan ini terlihat seperti ini:
- Tandai lokasi rak dengan garis vertikal. Jika pelapisnya akan dilakukan dengan pelapis dinding vinil, maka jarak antar vertikal dibuat 60 cm, jika menggunakan pelapis semen fiber berat maka jaraknya harus dikurangi menjadi 30 cm,
- Untuk memastikan gantungan berada pada posisi yang benar dan ditempatkan tepat dalam satu baris, gunakan garis horizontal dengan kelipatan 50 cm Perpotongan garis horizontal dan vertikal merupakan titik pemasangan gantungan.
- Pasang pengencang ke alas sesuai dengan tanda dan bor lubang melalui lubang pemasangan suspensi,
- Kencangkan suspensi dengan pasak plastik, begitulah cara pemasangan semua suspensi.
- Lubang isolasi termal harus digantung pada braket dengan tangan Anda sendiri,
- Selain itu, kencangkan insulasi dengan pasak dan payung,
- Isi celah isolasi
- Di atas insulasi pada gantungan, Anda perlu memasang film tahan angin dan lembab.
Film tahan angin dan lembab tidak akan merugikan, meskipun Anda tidak mengisolasi atap pelana, karena akan melindunginya dari kelembapan.
- Pemasangan rak. Perbaiki profil CD di gantungan. Dalam hal ini, sangat penting untuk menyelaraskannya dengan benar sehingga rak membentuk bidang vertikal yang rata, oleh karena itu lakukan pemasangan menggunakan tingkat bangunan dan aturan panjang. Anda juga dapat meregangkan beberapa utas di antara profil luar untuk menyelaraskan tiang perantara.
- Jika pedimen memiliki jendela, kencangkan profil di atas dan di bawahnya dalam posisi horizontal, mis. membuat pelompat.
Ini menyelesaikan pemasangan bingkai. Dalam hal eksekusi bingkai kayu pekerjaan dilakukan agak berbeda - palang dipasang langsung ke dinding, dan insulasi diletakkan di antara keduanya. Dalam hal ini, selubung dapat dibuat dalam dua lapisan - pertama horizontal dan kemudian vertikal, yang akan menghasilkan lapisan insulasi 10 cm.
Untuk memberikan celah ventilasi antara pelapis dinding dan penahan angin, bilah setebal 2-3 cm dipasang di atas selubung.
Menutupi bingkai dengan memihak
Menyelesaikan atap pelana dengan pelapis dinding dilakukan sebagai berikut:
- Strip jendela dipasang di sekeliling jendela, seperti profil lainnya, dipasang dengan sekrup sadap sendiri. Pastikan untuk meratakannya dan pastikan sudutnya sesuai dengan 90 derajat,
- Jika pedimen tidak berada pada bidang yang sama dengan dinding, pasang pasang surut pada pembatas dengan posisi horizontal,
- Kemudian profil awal dipasang di atas pasang surut, yang juga harus ditempatkan secara horizontal,
- Di sudut, mis. Di persimpangan atap dan atap pelana, pasang strip akhir, yang disebut profil-j.
Untuk menyambung panel dalam baris horizontal, profil H harus dipasang.
- Potong tepi panel pertama dengan sudut sama dengan sudut atap,
- Kaitkan panel ke strip awal dan masukkan ke dalam profil J yang terletak di sepanjang atap,
- Kencangkan panel ke bingkai menggunakan sekrup,
- Panel terluar pada baris juga harus dipotong pada sudut yang sama dengan kemiringan lereng untuk memasukkannya ke dalam profil J. Jika pelapis dindingnya terbuat dari vinil, maka dapat dipotong dengan gergaji ukir. Jika bahan finishingnya adalah logam, sebaiknya menggunakan gerinda untuk memotong,
- Baris kedua dihubungkan ke baris pertama dan juga dipasang ke bingkai dengan sekrup sadap sendiri. Semua panel berpihak dipasang sesuai dengan prinsip ini.
Saat memasang panel vinil ke rangka, jangan mengencangkan sekrup terlalu kencang agar pelapis dinding dapat bergerak bebas. Jika hal ini tidak dilakukan, akibatnya panel dapat retak ekspansi termal.
Sekrup sadap sendiri perlu dikencangkan beberapa milimeter
Ini melengkapi lapisannya. Terakhir, saya perhatikan bahwa pemasangan pelapis dinding dapat dilakukan bahkan tanpa selubung, tetapi untuk ini, pedimen harus memiliki bidang yang rata sempurna. Selain itu, dengan pemasangan seperti itu, isolasi eksternal tidak dapat dilakukan.
Sekarang Anda tahu cara mengisolasi dan menutup atap pelana dengan memihak sendiri. Jika ada kesulitan yang muncul selama bekerja, tulis komentar dan saya akan dengan senang hati membantu Anda.
Menutupi atap pelana dengan memihak
Bagaimana cara menutupi atap pelana dengan memihak? Baca artikel untuk petunjuk pemasangan DIY
Cukup cara yang terjangkau untuk memperbarui fasad - ini adalah penggunaan pelapis dinding. Bahan ini terjangkau, memiliki tampilan yang menarik, dan pengerjaannya cukup sederhana, sehingga seorang pemula pun dapat menangani tugas pemasangannya.
Selain pada dindingnya sendiri, finishing ini juga bisa ditempelkan pada pedimen atau pondasi. Untuk melakukan semuanya dengan benar dan mendapatkan hasil yang diinginkan, Anda perlu mengetahui cara menutupi pedimen dengan pelapis dinding, bahan apa dan berapa jumlah yang dibutuhkan.
Jenis berpihak
Bahan finishing ini terdiri dari panel padat dengan panjang maksimal 6 m dan lebar 10 sampai 30 cm, masing-masing pabrikan mempunyai ukurannya masing-masing, sehingga dalam memilih finishing sebaiknya membeli dalam jumlah yang dibutuhkan dari satu pabrikan. Karena kekhasan produksinya, pelapis dinding adalah bahan yang sangat tahan lama. Dengan memilihnya untuk mendekorasi seluruh rumah, Anda bisa melupakan perlindungan dinding luar untuk waktu yang lama (sekitar 50 tahun).
Beberapa jenis pelapis dinding digunakan sebagai pelapis atap pelana sebuah rumah. Perbedaan utama mereka adalah bahan dari mana panel dibuat.
- Polivinil klorida. Casingnya terbuat dari dari bahan ini, disebut vinil. Hasil akhir ini sangat ringan, ramah lingkungan, tahan panas dan sangat terjangkau karena harganya yang murah. Produsen memproduksi banyak tekstur dan warna. Ini adalah pilihan yang bagus untuk menutupi atap pelana dengan memihak sendiri. Bahannya mudah diproses dan tidak memerlukan penguatan tambahan pada alasnya.
- Aluminium dan baja. Unsur seperti itu disebut logam. Hasil akhir ini akan lebih kuat dari yang sebelumnya. Tidak luntur di bawah sinar matahari, tetapi harganya sedikit lebih mahal. Proses pemasangannya akan memakan waktu lebih lama karena logam lebih sulit dipotong.
- Serat semen dan selulosa. Lapisan ini Ini cukup berat, jadi ketika memilih, Anda perlu memperhitungkan kekuatan permukaan dan fondasi yang menahan beban. Jika tidak mencukupi, maka penguatan tidak dapat dilakukan. Harganya jauh lebih tinggi dibandingkan dua opsi sebelumnya.
Perhitungan bahan
Untuk menutupi atap pelana dengan pelapis dinding dengan benar, Anda harus segera membeli semua elemen yang diperlukan dan jumlah panel yang cukup. Perlu segera diklarifikasi bahwa, setelah memilih panel dari satu pabrikan, Anda perlu membeli aksesori darinya.
Pabrikan lain mungkin memiliki ukuran dan bahkan warna yang berbeda. Saat memasang pelapis dinding pada atap pelana, akan merepotkan jika menggunakan elemen yang tidak ada ukuran yang sesuai, rapikan atau padatkan. Hal ini dapat berdampak buruk pada penampilan dan keandalan struktur.
Jika Anda membutuhkan panel dalam jumlah besar, Anda harus membelinya dari satu batch. Beda pengiriman walaupun sedikit, bisa saja berbeda warnanya.
Jumlah bahan yang lebih akurat dapat dihitung dengan membuat gambar kecil dan mengukur pedimen.
Dalam hal ini, gambar juga akan membantu Anda memilih tempat yang nyaman untuk memasang potongan trim. Jika atap pelana sebuah rumah ditutup dengan pelapis dinding, terutama pelapis dinding berbentuk segitiga, potongan tidak dapat dihindari. Dan dengan menggunakannya di tempat yang tidak terlalu terlihat, Anda dapat mengurangi jumlah panel yang dibeli.
Agar pelapis atap pelana dapat digunakan dengan cepat, selain panel itu sendiri, Anda juga perlu membeli:
- balok kayu atau profil logam untuk rangka,
- isolasi dan kedap air,
- sudut luar dan dalam,
- batang awal dan akhir,
- profil J,
- lampu sorot,
- trim jendela, jika ada jendela dengan kemiringan pada pedimen,
- paku atau sekrup untuk mengencangkan.
Di mana untuk memulai
Menutupi atap pelana dengan pelapis dinding praktis tidak berbeda dengan finishing eksterior bagian rumah yang lain. Semuanya dimulai dengan persiapan pondasi. Semua kemungkinan kotoran dan noda dihilangkan.
Jika ada retakan atau lubang, perlu diplester. Penting juga untuk mengatakan bahwa panel vinil dapat dipasang pada permukaan dengan perbedaan tidak lebih dari 5 mm. Oleh karena itu, jika terdapat penyimpangan yang besar, permukaannya diratakan terlebih dahulu.
Anda perlu memberi perhatian khusus pada permukaan kayu. Jika ditemukan papan yang busuk, maka harus diganti. Jika elemen yang rusak tetap berada di bawah permukaan akhir, hal tersebut dapat menyebabkan pembusukan menyebar lebih dalam ke insulasi.
Setelah itu, Anda perlu menutupi permukaan dengan primer dan memasang bingkai. Jarak antar elemen rangka sebaiknya 40–60 cm, selanjutnya insulasi dipasang rapat dan ditutup dengan anti air. Pada tahap ini, persiapan sudah selesai, barulah Anda bisa memasang pelapis dinding.
Pemasangan berpihak
Hampir selalu, produsen memberi instruksi rinci pada instalasi.
Namun informasi dalam artikel ini juga akan membantu Anda mempelajari cara menutupi atap pelana rumah dengan dinding.
- Pertama, Anda perlu memasang strip awal. Mereka dipasang di bagian bawah pedimen secara horizontal, tingkat bangunan digunakan untuk memeriksa. Sekrup tidak disekrup dengan kencang ke papan, tetapi menyisakan celah untuk ekspansi di musim panas. Hal ini juga berlaku pada kuku. Antara dua elemen yang berdekatan Anda juga perlu memberi jarak 5–7 mm untuk alasan yang sama.
- Selanjutnya, pasang sudut dalam di sepanjang kemiringan atap. Juga perlu untuk meninggalkan celah dari bar awal ke bar sudut. Sudut-sudutnya harus diproses dengan hati-hati (dipangkas dan diampelas) agar tidak merusak penampilan.
- Jendela selesai dengan profil J jika rata dengan trim. Jika ada kemiringan, gunakan strip jendela, dan pasang strip akhir di dekat lereng itu sendiri.
- Jika sambungan panel direncanakan pada pedimen warna yang berbeda atau tekstur, maka Anda perlu memasang H-bar. Anda dapat mempelajari lebih lanjut tentang strip pelapis dinding di artikel: cara memasang strip starter pelapis dinding dengan benar.
- Sekarang panel sedang dipasang. Pertama-tama harus dipotong sesuai bentuk pedimen, harus diingat bahwa elemen tidak boleh dipasang rapat di strip sudut, juga perlu celah untuk pemuaian. Panel pertama dipasang di strip awal dan diselipkan di sudut. Selanjutnya, bagian tersebut dipasang ke rangka melalui lubang pemasangan menggunakan sekrup atau paku sadap sendiri. Elemen selanjutnya dipasang dengan cara yang sama.
- Sebelum memasang panel terakhir, Anda perlu memasang strip akhir. Dan isi dengan elemen terakhir. Untuk keandalan, dapat diamankan dengan paku.
Seluruh proses pemasangan pelapis dinding pada atap pelana tidak serumit kelihatannya pada pandangan pertama, yang utama adalah mengikuti petunjuknya.
Petunjuk langkah demi langkah untuk menutupi atap pelana dengan pelapis dinding
Untuk mengisolasi loteng rumah, Anda bisa menggunakannya berbagai bahan. Pilihan yang bagus untuk ini adalah menutupi atap pelana dengan pelapis dinding.
- kelongsong luar rumah, melakukan beberapa fungsi penting sekaligus.
Pertama-tama, ini adalah desain dekoratif bangunan, sehingga memberikan tampilan yang rapi dan elegan.
Selain itu, pelapis dinding memungkinkan material dinding untuk "bernapas" - mis. mempromosikan penghilangan uap dari ketebalan kue dinding, menjaga sifat kerja struktur selama bertahun-tahun.
Bahan yang relatif murah, kemungkinannya instalasi sendiri- properti tambahan namun tidak kalah pentingnya yang membuat kelongsong populer dan diminati konsumen.
Pedimen adalah bagian dinding berbentuk segitiga (paling sering), dibatasi oleh kemiringan atap dan, di sisi alasnya, oleh sebuah cornice. Tergantung pada solusi arsitekturalnya, pedimen dapat menjadi kelanjutan dari dinding, atau elemen terpisah, tapi bagaimanapun juga, ini berfungsi sebagai dasar kemiringan atap, apa pun bentuknya.
Ada banyak jenis atap pelana:
- Segitiga.
- Trapesium.
- Robek.
- Luchkovy.
- Melangkah.
- Bundar.
- Tanpa hambatan.
Semua jenis atap pelana memiliki fungsi yang sama - kelanjutan dinding hingga menyentuh lereng atap, atau berfungsi sebagai dinding ujung loteng. Untuk konstruksi perumahan pribadi, bentuk yang paling khas adalah bentuk segitiga, atau bentuk segi lima yang lebih kompleks, yang diperoleh pada rumah dengan atap miring.
Cara menghitung jumlah pelapis dinding atap pelana
Untuk menghitung jumlah pelapis dinding yang dibutuhkan, Anda harus terlebih dahulu menghitung luas atap pelana. Tergantung pada bentuknya, rumus geometris biasa digunakan untuk menentukan luas bangun sederhana - segitiga sama kaki, trapesium.
Untuk menentukan luas pedimen dengan atap miring, Anda dapat membaginya secara kondisional menjadi dua gambar - trapesium ( Bagian bawah) dan segitiga sama kaki (bagian atas), hitung luasnya dan jumlahkan hasilnya.
Mengingat pelajaran geometri sekolah, luas segitiga adalah setengah hasil kali alas dan tinggi, dan untuk trapesium - jumlah alas dikalikan tinggi dan dibagi dua.
Harus diingat bahwa perkiraan luas atap pelana saat membeli pelapis dinding harus ditingkatkan 10-15%, karena selubung harus dipotong miring, dan hiasannya akan sia-sia, jadi cadangan daerah akan diperlukan.
Selain itu, kesalahan dalam pengukuran, pemotongan atau pemasangan selalu mungkin terjadi, adanya material tambahan akan membantu memberikan kompensasi kepada mereka.

Elemen tambahan
yang diperlukan untuk melapisi pedimen adalah:
- Strip awal (jika pedimen secara struktural terpisah dari bidang dinding).
- Bilah akhir.
- profil-H.
- Profil-J.
- Soffit, tali L.
- Cetakan, lapisan dekoratif, dll.
- Elemen dekorasi jendela (jika ada).
Anda sebaiknya menggunakan elemen tambahan hanya dari pabrikan yang sama dengan panel pelapis utama. Selain itu, Anda tidak dapat menggunakannya elemen logam bersama dengan vinil - karena koefisien muai panas yang berbeda, kekencangan kanvas akan terganggu.
Jenis pelapis dinding yang berbeda dari pelapis dinding dapat digunakan untuk menyelesaikan atap pelana.. Terkadang solusi seperti itu sangat berhasil menghiasi tampilan rumah, terutama jika pelapis dinding horizontal digunakan untuk dinding dan pelapis vertikal digunakan untuk atap pelana.

Urutan pekerjaan
Semua pekerjaan memiliki urutan berikut:
- Pemasangan selubung.
- Pemasangan insulasi (jika perlu), uap dan anti air.
- Pemasangan rel awal, profil H, profil sudut, desain bukaan jendela.
- Pemasangan panel dinding utama.
- Pemasangan lampu sorot dan tali L.
Tergantung pada kompleksitas arsitektur rumah, beberapa operasi tambahan mungkin diperlukan, tetapi ini adalah daftar pekerjaan dasar.
Pemasangan selubung pada atap pelana
Prinsip pemasangan secara umum sama dengan aturan pemasangan pada dinding. Jika diperlukan insulasi luar, maka selubung primer dipasang dengan arah papan sama dengan letak panel pelapis.
Bidang bilah diratakan dengan hati-hati, sehingga akan lebih mudah untuk menggunakan kabel yang diregangkan di antara bilah terluar yang dipasang terlebih dahulu. Ketinggian di atas permukaan dinding tidak boleh kurang dari ketebalan insulasi. Ketinggian papan sesuai dengan lebar insulasi (biasanya 60 cm).
Setelah memasang bahan insulasi dan proteksi uap air, counter-lattice dipasang. Ini akan memainkan peran sebagai sistem pendukung panel dinding dan, pada saat yang sama, menyediakan celah ventilasi antara selubung dan material dinding.
Jarak papan paling sering dibuat sekitar 40 cm untuk kekuatan pengikatan selubung yang lebih besar.
Bahan untuk selubungnya secara tradisional adalah kayu - digunakan batangan halus dan lurus dengan ketebalan yang dibutuhkan. Opsi ini bukan yang paling berhasil, karena kayu dapat mengalami lengkungan, pembengkakan, dan perubahan struktur lainnya, yang berdampak buruk pada kondisi kelongsong secara keseluruhan.
Baru-baru ini, pemandu logam untuk papan gipsum telah menjadi bahan utama untuk pembubutan, bebas dari segala kelemahan batang kayu, memungkinkan penyesuaian bidang yang tepat, dan tidak mengalami korosi karena lapisan galvanis.
Mengingat perbedaan harga yang minimal, pilihan strip logam sepenuhnya dapat dibenarkan dan rasional.

Pemasangan profil sudut internal dan eksternal
Profil sudut dipasang di sisi bukaan jendela (sudut luar), di sepanjang garis kemiringan atap (sudut dalam). Tugasnya adalah memastikan konjugasi bidang pedimen dan lampu sorot atau pedimen dan kemiringan bukaan jendela.
Tepi atas dan bawah strip sudut yang terletak di sepanjang garis miring lereng harus dipangkas sudut yang tepat. Untuk penyambungan memanjang, profil dipotong sehingga diperoleh tumpang tindih 25 mm, dan strip atas harus berada di atas strip bawah.
Ini mencegah air mengalir masuk ke bawah casing.. Pada saat yang sama, papan J dipasang di tepi luar atap pelana yang menjorok. Mereka dimaksudkan untuk mengamankan tepi luar lampu sorot.
CATATAN!
Saat memasang semua elemen berpihak, pastikan untuk memperhitungkan ekspansi termal material, yang memerlukan sambungan memanjang elemen bantu(starter strip, J-plank, dll) tidak dibuat berdekatan, melainkan dengan jarak sebesar waktu musim dingin- 12 mm, di musim panas - 6 mm. Untuk tujuan yang sama, sekrup tidak dikencangkan sepenuhnya, sehingga bagian tersebut dapat bergerak bebas di dalam alur pemasangan.

Pemasangan panel berpihak biasa
Diproduksi sesuai dengan skema biasa:
Baris panel bawah (pertama) dimasukkan ke dalam kunci batang awal, dan pada saat yang sama dimasukkan ke dalam lekukan sudut dan profil H di samping. Bagian atas panel (strip paku) dipasang dengan sekrup sadap sendiri ke selubung.
Semua panel selanjutnya dipasang dengan cara yang mirip dengan bagian paling atas. Tugas utamanya adalah menjaga sudut secara akurat saat memotong panel dan, pada saat yang sama, menjaga jarak bebas termal untuk pergerakan bebas di sudut dan papan H selama ekspansi.
Jika celahnya tidak mencukupi, kain pelapis dinding akan mulai membengkok ke luar, yang dapat menyebabkan kerusakan panel.
DENGAN HATI-HATI!
Pekerjaan pemasangan pelapis dinding pada atap pelana dilakukan pada ketinggian, terutama jika rumah memiliki dua lantai (atau lebih). Penting untuk memastikan terlebih dahulu keamanan dan pekerjaan yang nyaman, menghilangkan kemungkinan alat, bahan dan pekerja itu sendiri terjatuh dari perancah.

Pemasangan lampu sorot
Pemasangan lampu sorot dianggap sebagai tahap akhir dari pelapis atap pelana, meskipun sangat mungkin untuk mendesain atap pelana terlebih dahulu, dan baru setelah itu mulai memasang panel baris pada bidang vertikal.
Pertama-tama, perlu untuk memastikan kemungkinan pengikatan elemen, yang tergantung pada jenis atap yang menjorok.
Ada:
- Overhang tertutup. Itu dilapisi dengan papan di bagian bawah, memasang strip profil pada alas seperti itu tidak menimbulkan masalah.
- Buka overhang. Dalam hal ini terdapat kelanjutan bahan atap yang tidak memiliki kelongsong di bawahnya. Untuk memasang ekstensi dan lampu sorot itu sendiri, diperlukan ekstensi. kaki kasau dan memasang palang penyangga padanya. Tugas ini cukup sulit karena lokasi lokasi kerja yang tidak nyaman - pada ketinggian, pekerjaan dilakukan dari bawah. Keadaan ini terkadang memaksa seseorang untuk meninggalkan pemasangan lampu sorot.
Lampu sorot dipasang di alur sudut internal yang dipasang paralel dan tali J di sepanjang tepi overhang. Aturan pemasangannya tetap sama - jangan kencangkan sekrup sepenuhnya, sisakan celah suhu.
Untuk memasang lampu sorot, salah satu ujungnya dimasukkan ke dalam alur profil, dan elemen penerima sedikit ditekuk agar lampu sorot dapat dimasukkan ke dalam alur. Tidak disarankan untuk menerapkan terlalu banyak tenaga, yang dapat merusak elemen penerima secara permanen.
Untuk merancang putaran sudut lampu sorot, digunakan profil H atau dua profil J, dipasang rapat dengan platform belakangnya saling berhadapan.
Persimpangan dua lajur dapat dibuat pada sudut 45°, atau satu lajur berlanjut hingga ujung overhang, dan lajur kedua menyambungkannya dari ujung ke ujung melalui batang-H. Opsi kedua agak lebih sederhana, yang sangat penting ketika bekerja di ketinggian sulit dan tidak nyaman.
Tahap terakhir adalah pemasangan L-plank yang menjadi potongan ujung cornice.

Video yang bermanfaat
Dalam video ini Anda akan belajar cara menyelesaikan pedimen dengan pelapis dinding:
Kesimpulan
Menutupi atap pelana dengan pelapis dinding sulit dilakukan karena lokasi lokasi kerja yang tidak nyaman dan kebutuhan untuk memotong panel secara miring, yang dapat menyebabkan kemungkinan kesalahan. Jika tidak, operasi ini tidak menimbulkan masalah khusus dan cukup berhasil dilakukan secara mandiri. Finishing atap pelana dengan pelapis dinding yang berkualitas tinggi menjadikan rumah kokoh, berpenampilan menarik, menciptakan kelengkapan, dan menyatukan secara harmonis seluruh elemen struktur bangunan.
Dalam kontak dengan
Melapisi pedimen dengan pelapis logam adalah cara paling ekonomis dan populer untuk menyelesaikan eksterior rumah pribadi.
Bahkan rumah-rumah tua dengan kayu-kayu yang digelapkan atau lapisan-lapisan yang cacat di antara batu bata dapat terlihat mengesankan lagi jika diperbarui dengan bahan-bahan modern untuk finishing fasad.
Menutupi atap pelana dengan pelapis logam tidak hanya akan memberikannya pemandangan indah, tetapi juga akan mengisolasi loteng. Selain itu, pekerjaan ini tidak memerlukan penguasaan keterampilan khusus apa pun.
Pemasangan tanpa selubung
Metode kedua melibatkan pemasangan pelapis logam langsung pada bahan pembuat pedimen (bata, kayu) tanpa terlebih dahulu membuat selubung.
Pemasangan panel pelapis logam menggunakan metode ini melibatkan penggunaan braket bertulang khusus yang dipasang pada pedimen. Saat menggunakan insulasi, insulasi ditempatkan di antara braket dan profil.
Dari sudut pandang praktis, tidak ada perbedaan khusus dalam metode pemasangan pelapis logam. Dalam kasus pertama, fasad akan diisolasi lebih baik, dan dalam kasus kedua, ventilasinya akan lebih baik.
Bahan dan alat untuk bekerja
Karena pelapis dinding logam tidak memerlukan pemasangan yang rumit dan dapat dilakukan secara mandiri, pekerjaan tersebut memerlukan seperangkat alat sederhana:
- Tang;
- mengebor;
- tingkat bangunan;
- atau paku galvanis;
- palu konstruksi;
- obeng atau obeng;
- pita pengukur, pensil, kotak.
Untuk menutupi pedimen Anda juga membutuhkan bahan dan komponen berikut:
- panel berpihak logam;
- Profil-J dipasang di ujung panel;
- Profil-H yang menghubungkan panel pelapis logam satu sama lain;
- papan angin;
- palang akhir dan awal;
- sudut dalam dan luar;
- strip dekat jendela untuk menyelesaikan bukaan jendela. Pilihannya secara langsung bergantung pada bentuk jendela (bulat atau persegi panjang). Jika pedimen tidak memiliki jendela, elemen ini tidak dibeli;
- lampu sorot yang digunakan untuk atap.

Pekerjaan persiapan
Sebelum melanjutkan langsung ke pemasangan pelapis logam, perlu dilakukan beberapa hal pekerjaan persiapan. Pertama-tama, perlu menghitung jumlah bahan finishing yang dibutuhkan. Saat ini, banyak situs yang menjual pelapis dinding logam memiliki kalkulator online yang memudahkan untuk menghitung berapa banyak material yang dibutuhkan. Bersamaan dengan panel, Anda harus membeli semua elemen tambahan yang diperlukan.

Jika setelah membeli pelapis logam, pemasangannya akan dilakukan beberapa waktu kemudian, sebaiknya siapkan tempat penyimpanannya.
Penting! Untuk menghindari kerusakan pada lapisan dekoratif atas pelapis dinding, saat menyimpannya, dilarang keras meletakkan apapun di atasnya.
Selanjutnya, Anda perlu menyiapkan permukaan pedimen, membersihkannya dari kotoran dan tumbuh-tumbuhan, serta menghilangkan lapisan lama dan struktur lain yang ada. Ketika pekerjaan persiapan selesai, Anda dapat mulai melapisi pedimen.
Pemasangan selubung
Desain mesin bubutnya menyerupai fasad berventilasi, yang memastikan dinding kering dan berventilasi baik. Selubung kayu dianggap lebih “berubah-ubah”, karena harus cukup kering dan diolah terlebih dahulu dengan antiseptik. Selubung harus dipasang di persimpangan panel, di sekitar pintu dan jendela (jika ada).
Balok kayu atau profil logam dipasang menggunakan sekrup sadap sendiri, dan jarak selubung bisa dari 40 cm (disarankan) hingga 90 cm Setelah memasang selubung, plastik busa atau wol mineral. Isolasi berfungsi untuk menahan panas. Pemasangannya dilakukan dari atas ke bawah, dan pengikatannya dilakukan dengan pasak berbentuk cakram.

Untuk melindungi pedimen dari kebocoran uap air, pedimen diletakkan di atas insulasi. Penggunaan film difus adalah wajib meskipun insulasi tidak dipasang.
Fitur pemasangan panel berpihak logam
Menghadapi pedimen dengan pelapis logam dilakukan dalam beberapa tahap:
- Pemasangan garis start;
- Pemasangan sudut luar dan dalam yang kompleks;
- Pemasangan panel baris;
- Mengatur sudut sederhana;
- Instalasi lampu sorot.
Pertama-tama, batang awal dipasang sedikit lebih tinggi, 3-4 cm, tingkat pertama pengikatan panel. Selanjutnya, strip awal dipasang pada jarak 5-6 mm. Kesenjangan ini menghindari tumpang tindih panel akibat ekspansi termal. Maka Anda perlu mengamankan strip finishing yang dipasang di bawah atap atap.
Jika elemen tambahan yang kompleks dengan pelapis logam digunakan, maka elemen tersebut diikat dengan penambahan 20-30 cm, hal ini disebabkan oleh geometri strukturnya yang kompleks, oleh karena itu, untuk memastikan pengikatan yang andal, diperlukan pengeboran sekrup yang sering disadap sendiri.
Pemasangan strip sambungan yang rumit dilakukan hanya setelah penandaan awal pada permukaan pedimen, serta menandai semua tempat sambungan panel. Di bagian paling atas panel pelapis logam terakhir, bagian atas strip dipasang, dan tepi bawah harus sedikit menonjol di luar strip awal, sekitar 5-6 mm. Saat memasang bilah dok yang rumit, sangat penting untuk memastikan bahwa bilah tersebut benar-benar tegak lurus dengan strip awal.
Di sekitar bukaan pintu dan jendela, strip diikat dari bawah. Pada sambungan sudut perlu untuk memotong "telinga", yang kemudian ditekuk. Untuk mencegah air merembes ke sudut, disarankan untuk memasang segel universal di sekitar pintu dan jendela.
Memasang panel berpihak logam biasa tidak berbeda dengan memasang panel vinil. Panel-panel tersebut disambung menggunakan strip sederhana atau konektor-H yang rumit.
Penting! Lapisan pelindung dari panel dilepas segera sebelum pemasangan, untuk menghindari kerusakan yang tidak disengaja pada sisi depan.
Pemasangan panel dimulai dari sudut pedimen dengan urutan sebagai berikut: baris pertama panel menempel pada strip awal dengan kunci bawah. Baris berikutnya dihubungkan ke kunci baris paling bawah. Saat memasang baris terakhir di bawah jendela, strip dekat jendela dimasukkan ke dalam ceruk gergajian dan dipasang ke kunci baris bawah. Barisan panel terakhir dipasang di bawah atap dengan cara yang sama.
Strip sudut sederhana dipasang setelah memasang panel pelapis logam di sisi depan. Untuk mengencangkannya, sekrup self-sapping galvanis digunakan, dibor melalui logam. Dianjurkan untuk membeli sekrup yang sesuai dengan warna panel.
Tahap terakhir dalam menutupi pedimen dengan pelapis logam adalah pemasangan lampu sorot. Biasanya, ini dipasang pada permukaan horizontal yang menghadap ke bawah - overhang dan cornice.
Jika pemasangan pelapis logam dilakukan dengan hati-hati dan benar, atap pelana seperti itu akan bertahan setidaknya 50 tahun. Pelapis logam tidak memerlukan perawatan khusus, jadi pedimen yang dilapisi bahan ini akan menyenangkan Anda dengan penampilannya yang indah selama bertahun-tahun.
Pelajaran video:
Video Bagian 1 (pedimen dengan pintu).
Video Bagian 2 (pedimen dengan pintu).
Video Bagian 3 (pedimen dengan jendela).
Ruang pada bagian atas dinding rumah, antara langit-langit dan lereng atap disebut pedimen. Bentuknya bisa bervariasi:
Permukaan pedimen bisa kosong atau dengan adanya bukaan jendela dan loteng. Pedimen sering kali dibuat terisolasi untuk mengurangi kehilangan panas melalui langit-langit. Melapisinya seperti dalam prosesnya pekerjaan perbaikan, dan selama konstruksi.
Pelapis dinding vinil adalah bahan yang paling umum digunakan untuk memihak fasad dan atap pelana rumah. Hal ini disebabkan biayanya yang rendah, variasi produk, daya tahan dan kemudahan pemasangan.
Menyelesaikan atap pelana dengan memihak tidak membutuhkan banyak waktu dan tenaga. Mengikuti instruksi pabriknya, Anda dapat menginstalnya sendiri.
Pekerjaan persiapan: pemilihan bahan
Untuk mencegah terjadinya kecelakaan teknis, pekerjaan persiapan perlu dilakukan dengan serius.

- Memasang panel berpihak dari tangga sulit dan merepotkan, Anda perlu memasang perancah.
- Siapkan area datar untuk menempatkan pelapis dinding dalam posisi horizontal.
- Belilah alat-alat yang diperlukan untuk pekerjaan itu: tingkat konstruksi, obeng, gunting logam, palu, pita pengukur, garis tegak lurus, gergaji ukir atau gergaji besi, kotak konstruksi.
- Hitung jumlah bahan yang dibutuhkan. Biasanya pabrikan menunjukkan pada kemasannya untuk area mana jumlah ini dimaksudkan. Untuk jumlah yang dibutuhkan Anda harus menambahkan 10% - cadangan untuk potongan dan pemotongan.
Pelapis dinding vinil fasad
Keuntungan dan kerugian:

Kerugiannya meliputi:
- ketidakstabilan terhadap tekanan mekanis;
- tidak ada celah selama pemasangan, yang menyebabkan deformasi di bawah pengaruh perubahan suhu.
Setiap perusahaan menggunakan teknologi produksinya sendiri, dan juga ketebalannya panel plastik bisa beragam. Oleh karena itu, disarankan untuk membeli bahan tambahan dan pelapis dinding biasa dari produsen yang sama.
Untuk instalasi Anda memerlukan:
- berpihak biasa;
- profil awal untuk memasang bagian bawah panel baris pertama;
- Profil-J untuk memasang pelapis dinding di sekitar bukaan jendela dan pintu;
- Profil-H untuk menyambung panel berpihak sepanjang;
- elemen sudut untuk desain sudut berkualitas tinggi dan estetis;
- strip finishing untuk melengkapi desain struktur, menutupi panel dinding biasa di ujungnya.
Perangkat keras

Pemilihan bahan pengikat memainkan peran penting. Paku atau sekrup sadap sendiri digunakan untuk mengencangkan dinding.
Harga paku jauh lebih terjangkau daripada sekrup sadap galvanis, tetapi paku memiliki sejumlah kelemahan:
- pemasangan dan pembongkaran yang tidak nyaman. Panel berpihak tidak stabil terhadap tekanan mekanis, dan integritasnya mudah rusak dengan pukulan palu yang tidak akurat;
- seiring waktu, fiksasi dapat melemah dan menyebabkan kendor, yang akan mempengaruhi penampilan struktur.
Dengan munculnya obeng, sekrup sadap sendiri diperoleh aplikasi yang luas. Keuntungannya meliputi:
- kecepatan dan kemudahan instalasi;
- kehadiran utas, yang berkontribusi pada fiksasi yang andal;
- mudah untuk menyesuaikan tingkat penekanan panel dinding ke selubung;
- jika perlu, bahan finishing dapat dibongkar tanpa mengganggu keamanannya.
Preferensi harus diberikan pada sekrup galvanis dengan kepala datar, yang panjangnya minimal 30 mm. Untuk mencegah munculnya karat pada titik pengikatan, digunakan mesin cuci karet khusus.
Mengetahui luas pedimen, mudah untuk menghitung jumlah bahan pengikat yang dibutuhkan. Pada panel horizontal, jarak pengikatan adalah 25-30 cm, profil H, profil J, dan elemen sudut diikat dengan kelipatan 40 cm, jumlah rata-rata sekrup yang dibutuhkan adalah per 10 meter persegi. m - 160 buah.
Pekerjaan instalasi
Pertama-tama, perlu menyiapkan pedimen bangunan:
- hapus semuanya elemen dekoratif menonjol di luar bidang dinding;
- lapisan akhir yang longgar, terutama yang sudah rontok, harus diperbarui atau dihilangkan seluruhnya;
- fasad kayu harus diperiksa keandalan pengikatannya dengan papan dan dirawat dengan impregnasi antiseptik yang mencegah munculnya jamur dan lumut;
- Sebaiknya bangunan baru diberi waktu menyusut sebelum mendekorasi pedimennya.
mesin bubut
Selubung adalah penopang untuk mengencangkan panel dinding. Penampilan atap jadi dan cornice bergantung pada tingkat kerataan permukaan tempat pelapis dinding dipasang. Oleh karena itu, perlu dilakukan pada bidang yang ideal.

Kehadiran selubung juga diperlukan untuk penempatannya bahan isolasi termal dan penghalang hidro-uap. Sekitar 30% kehilangan panas terjadi melalui atap.
Kesenjangan yang dibentuk oleh selubung antara dinding rumah dan panel dinding meningkatkan ventilasi, mengurangi pembentukan kondensasi, sehingga menormalkan kelembapan di dalam ruangan.
Selubung atap pelana dapat dibuat dari balok kayu atau profil logam.
Jika preferensi diberikan balok kayu, harus diingat bahwa kelembapannya tidak boleh lebih dari 15%, penampang optimal adalah 50*60 mm. Untuk mencegah korosi, jamur dan serangga, harus direndam terlebih dahulu dalam larutan antiseptik.
Saat memasang pelapis dinding vinil, jarak yang disarankan antara anak tangga selubung harus 40-60 cm.Di daerah yang terkena angin kencang, disarankan untuk mengurangi jarak selubung.

Jika pilihan dibuat untuk logam, perlu untuk memilih profil galvanis dengan pengaku.
Untuk mengencangkan profil logam ke alasnya, braket atau gantungan digunakan.
Mulailah memasang selubung di kedua sisi secara bersamaan. Sebuah tali ditarik di antara profil luar, yang berfungsi sebagai panduan untuk mempertahankan bidang horizontal.
Kemudian pasang braket tempat profil akan dipasang. Jika insulasi atap pelana disediakan, lapisan insulasi panas dan penghalang uap diletakkan, setelah itu profil lainnya dipasang.
Jika ada bukaan jendela dan loteng di pedimen, profil juga dipasang di sekeliling bukaan.
Setelah pemasangan selesai, pastikan untuk memeriksa kerataan bidang menggunakan level.
Harga selubung kayu urutan besarnya lebih rendah. Melakukannya sendiri tidaklah sulit.

Untuk memudahkan pekerjaan, perlu untuk memilih kayu kering yang rata (kayu basah akan berubah bentuk seiring waktu dan menyebabkan kerusakan pada seluruh struktur), diresapi dengan larutan anti-korosi. Disarankan menggunakan kayu yang sesuai dengan ukuran atap pelana.
Jika insulasi termal tidak disediakan, maka selubung dapat dipasang ke dasar atap pelana. Untuk melakukan ini, kayu sudah dibor sebelumnya dan dipasang ke dinding melalui lubang yang dihasilkan. Untuk menjaga pesawat, ditempatkan wedges.
Jika tersedia insulasi, pasang braket sesuai dengan tanda, kemudian letakkan lapisan insulasi termal dan penghalang air.
Pertama-tama, balok luar dipasang, dan kabel ditarik, yang berfungsi sebagai panduan untuk menjaga pesawat.
Setelah itu sisa balok diperbaiki. Jika terdapat bukaan jendela pada atap pelana rumah, dipasang kayu tambahan di sekelilingnya.
Aturan untuk mengencangkan panel berpihak
Berpihak rentan ekspansi linier sepanjang panjangnya di bawah pengaruh perubahan suhu. Panel tiga meter dipasang pada suhu lingkungan+5 0 , masuk periode musim panas memanjang sebesar 12 mm. Fitur-fitur vinil ini harus diperhitungkan saat memotong. Pabrikan menunjukkan kemungkinan perubahan parameter pada kemasan. Menghitung ukuran yang dibutuhkan tidaklah sulit saat mendekorasi cornice dengan tangan Anda sendiri.
Agar pelapis dinding dapat mengembang dan menyusut tanpa halangan, strip diukur 1,5 cm ukuran lebih kecil pedimen. Celah minimal 1 mm harus dibiarkan antara kepala sekrup dan pelapis dinding. Anda perlu memasang perangkat keras di tengah lubang yang digunakan untuk memasang panel. Kegagalan untuk mematuhi petunjuk ini menyebabkan deformasi lapisan rumah.

Pemasangan panel plastik
Saat menata atap dan atap dengan pelapis dinding untuk pertama kalinya, lebih baik memulai dengan atap pelana buta. Di tingkat langit-langit, Anda perlu memasang lampu tetes. Mereka menempelkannya dengan mesin cuci tekan ke setiap profil selubung dan di sepanjang ujungnya untuk meningkatkan kekakuan. Jika ada bukaan jendela, Anda harus memasang lereng dan pasang surut terlebih dahulu. Semua tepinya harus melebar untuk mencegah kelembapan menembus ke belakang bingkai selubung. Pasang profil-J di sekitar bukaan.
Sebuah palang awal dipasang di atas air surut, yang posisinya harus benar-benar horizontal. Saat memasang beberapa strip awal, sisakan jarak 10 mm di antara keduanya.
Langkah selanjutnya adalah memasang sudut bagian dalam.
Pada titik ini, pekerjaan persiapan untuk memasang dinding dengan tangan Anda sendiri telah selesai. Anda bisa mulai memasang panel vinil pada atap pelana rumah.
Anda dapat menggunakan penggiling untuk memotong dinding, tetapi dalam hal ini Anda harus menaikkan kabel listrik hingga setinggi atap rumah. Dalam hal ini, untuk kenyamanan, gunakan gunting. Untuk menghindari keharusan mengukur sudut atap setiap panel, disarankan untuk membuat template. Namun perlu diingat bahwa kemiringan setiap lereng mungkin berbeda, perlu dibuat dua templat, kiri dan kanan.

Pada instalasi yang benar panel vinil akan mendengar bunyi klik yang khas. Panel terakhir perlu dihias dengan strip akhir dan dihias dengan elemen sudut. Bagian atap yang menjorok dilapisi terakhir.
Semua rumah dengan atap miring dilengkapi dengan atap. Biasanya panjang cornice berkisar antara 40 cm hingga satu meter. Melindungi atap dan dinding rumah dari hujan dan salju merupakan fungsi utama dari cornice. Untuk kelongsongnya, digunakan lampu sorot, yang memiliki lubang ventilasi pada desainnya yang membantu ventilasi ruang di bawah atap. Dekorasi cornice dengan pelapis dinding dimulai dengan pemasangan bingkai. Itu harus dirangkai dalam dua bidang tegak lurus, tegak lurus satu sama lain. Setelah menutupi cornice dengan pelapis dinding, Anda perlu menutupi sambungan yang dipotong dengan profil akhir dan J-bevel.
Jika Anda mengikuti semua rekomendasi yang ditentukan oleh produsen pelapis dinding, menutupi sendiri atap atap akan membutuhkan sedikit waktu dan tenaga.
Melapisi atap pelana merupakan tahap akhir dari finishing eksterior rumah. Pada saat ini, master seharusnya tidak lagi memiliki pertanyaan tentang bekerja dengan bahan finishing utama: pelapis dinding. Instalasi vinil dan logam memiliki banyak kesamaan. Namun tetap saja, bekerja dengan masing-masing dari mereka memiliki nuansa tersendiri.
Ada juga beberapa kekhasan pada lapisan pedimen, yaitu bagian rumah yang terletak di antara lereng atap. Tingginya (pedimen) bisa kecil atau menjadi komponen lantai dua penuh. Yang terakhir ini juga berlaku untuk bangunan dengan loteng tempat tinggal. Rumah bergaya Provence terlihat paling nyaman. Oleh karena itu, sebagian besar pemilik rumah memilih metode dekorasi eksterior rumahnya.


Fitur Utama gaya arsitektur“Provence” – warna-warna terang, kesederhanaan dan kejelasan garis, suasana kekeluargaan yang ramah. Untuk mendekorasi rumah seperti itu, mereka memilih bahan yang harganya terjangkau dan kualitasnya sempurna. Berpihak sepenuhnya memenuhi kriteria ini. Ini tahan lama dan memiliki segalanya karakteristik yang diperlukan untuk memastikan perlindungan yang tepat pada dinding bangunan.

Untuk finishing bergaya Provence, pelapis dinding vinil akan menjadi pilihan terbaik. Berbeda dengan logam, logam ini mampu menghadirkan kenyamanan, kesederhanaan, dan kehati-hatian yang diperlukan untuk arah desain ini pada tampilan bangunan. Pada saat yang sama, rumah yang dilapisi dinding vinil terlihat modern dan terawat.


Bagian atas bangunan, pedimen, terlihat dari jauh. Dialah yang menciptakan kesan pertama terhadap rumah dan pemiliknya. Oleh karena itu, tahap pekerjaan finishing ini harus dilakukan dengan hati-hati, berpedoman pada detail petunjuk langkah demi langkah berdasarkan pengalaman dan rekomendasi para ahli.
Bahan yang dibutuhkan untuk pelapis atap pelana
Poin penting dalam pekerjaan finishing jenis apa pun - pilihan bahan dasar dan komponen. Ada satu aturan yang tidak dapat diubah, yang penerapannya menghilangkan banyak masalah selama instalasi. Dikatakan: semua elemen finishing harus dibeli dari satu produsen.


Pelapis vinil "Profil Alta"

Dalam hal ini, pembeli mendapat beberapa keuntungan:
- semua bagian akan disesuaikan dengan milimeter;
- menjadi mungkin untuk memilih skema warna yang paling sesuai;
- jika ada kekurangan bahan, dapat dibeli tanpa takut akan perbedaan corak warna yang signifikan.
Ada satu lagi poin penting saat memilih bahan yang perlu Anda ketahui. Struktur yang menghadap harus mencakup elemen-elemen yang direkomendasikan oleh pabrikan. Mengganti dengan bagian-bagian yang setara, tetapi dari jenis yang berbeda, tentu akan menimbulkan disonansi pada tampilan bangunan dan meningkatkan intensitas tenaga kerja dan kerumitan pemasangan.

Oleh karena itu, tidak disarankan untuk menggabungkan pelapis dinding vinil dan logam atau elemen tambahan dari bahan-bahan ini dalam pelapis atap pelana. Intinya bukan hanya pada tampilannya yang tidak memenuhi kaidah estetika, tetapi juga pada perbedaan koefisien muai panas produk tersebut. Hasil akhir yang menggabungkan logam dan vinil tidak akan tahan lama. Ada risiko tinggi terjadinya keretakan pelapis dinding vinil, siapa yang akan mengubahnya bentuk geometris di bawah pengaruh ekspansi dan kontraksi bagian logam.
Elemen tambahan untuk kelongsong atap pelana
Penggunaan komponen yang dipilih dengan benar selama pemasangan akan memungkinkan Anda mendapatkan struktur kelongsong berkualitas tinggi yang tidak takut terhadap angin kencang, embun beku, atau kelembaban tinggi. Untuk menutupi atap pelana dengan pelapis dinding, Anda perlu membeli beberapa jenis elemen tambahan. Produk yang ditujukan untuk finishing bukaan jendela diperlukan jika terdapat jendela pada pedimen.
| nama Produk | Tujuan dan fitur |
|---|---|
| Dipasang terlebih dahulu, ini adalah lembaran panjang dan sempit tempat tepi bawah panel pertama dipasang. |
| Menguras air dari dasar bangunan. |
| Detail yang memungkinkan Anda menutup sambungan antara panel dinding dan lampu sorot yang diletakkan secara horizontal memberikan tampilan sambungan yang estetis. |
| Dirancang untuk finishing bukaan jendela yang lebarnya kurang dari 14 cm, memiliki profil yang agak rumit, termasuk elemen kemiringan dan casing. |
| Didesain untuk finishing bukaan jendela dan pintu dengan lebar kemiringan lebih dari 14 cm. |
| Dipasang di sekeliling bukaan jendela dan pintu, setiap potongan vertikal dan horizontal, sambungan di sepanjang garis miring dinding dan atap, untuk pengarsipan dan pengikatan lampu sorot. |
| Digunakan untuk menutupi bukaan jendela yang terletak pada bidang yang sama dengan dinding bangunan. |
| Dirancang untuk menutupi dan menahan ujung panel dinding pada sudut dalam dan luar rumah. Saat menutupi atap pelana, digunakan jika area yang akan diselesaikan memiliki topografi yang kompleks: tepian dan relung relatif terhadap bidang dinding. |
| Ini adalah elemen yang menyelesaikan pemasangan struktur menghadap. Dipasang di atas panel trim atas terakhir. Saat menyelesaikan pedimen, perlu dilakukan jika kemiringan atap memiliki bentuk yang rumit, termasuk bagian horizontal. |
| Strip tipis ini diperlukan untuk menyatukan elemen finishing yang berbeda dan menutupi celah. |
| Panel dirancang untuk melapisi bagian dalam atap yang menjorok. |
| Memberikan perlindungan pada ruang loteng dari hembusan angin. |


Saat memilih serangkaian elemen tambahan yang diperlukan untuk melapisi pedimen, pengrajin pemula pasti akan menemukan satu fitur: berbagai nama. Hal ini dapat menyebabkan kebingungan dan kesalahpahaman. Ini sebenarnya sederhana. Produsen, yang ingin membedakan produknya dari produk sejenis secara umum, memberi mereka nama sendiri.
Misalnya, bilah awal juga disebut “bilah awal”. J-Trim - “profil berbentuk J” atau “profil J”. Strip akhir adalah “profil yang pas”. Fitur yang sama juga terdapat pada nama elemen tambahan lainnya.
Untuk menavigasi keragaman ini dengan benar, pertama-tama Anda harus memperhatikan profil produk. Untuk elemen dengan tujuan yang sama, selalu sama, kecuali nuansa kecil yang diperkenalkan oleh pabrikan untuk menonjolkan fitur produknya.
Poin ini sangat penting untuk diperhatikan. Membeli komponen dari berbagai merek pasti akan menimbulkan banyak masalah selama pemasangan, terlepas dari kerumitan topografi atap pelana dan ada tidaknya bukaan jendela.
Perhitungan yang benar tentang jumlah bahan untuk menutupi atap pelana dengan pelapis dinding
Saat menentukan jumlah pelapis dinding untuk menutupi dinding rumah, cukup melakukan dua jenis pengukuran: temukan panjang total dan tinggi semua dinding. Kemudian dihitung luas bangunannya dan hasilnya dibagi dengan luas satu unit bahan finishing. Dengan cara ini diperoleh indikator jumlah panel yang dibutuhkan.
Dalam kasus atap pelana, semuanya jauh lebih rumit, karena elemen bangunan ini bisa jadi rumit bentuk arsitektur. Namun dalam kebanyakan kasus, ada dua jenis:
- berbentuk segitiga beraturan;
- mempunyai bentuk trapesium.

Terlepas dari jenis strukturnya, sebelum memulai pengukuran dan perhitungan, Anda perlu mencari tahu berapa luas salah satu panel dinding. Untuk melakukan ini, panjangnya dikalikan dengan lebarnya.
Contoh perhitungan.
Rata-rata panel berpihak vinil memiliki panjang 3,05 m dan lebar 24 cm, dari berbagai produsen Anda dapat menemukan bilah dengan lebar 17,9 cm, 20,5 cm, 23,2 cm, 25,6 cm, bekali diri Anda dengan kalkulator dan kalikan dengan 3 ,05 mx 0,24 m, diperoleh 0,732 m2. Ini adalah luas satu panel berpihak.
Selanjutnya Anda perlu melakukan serangkaian pengukuran. Untuk melakukan ini, Anda memerlukan pita pengukur, kertas, dan pensil. Cara paling mudah untuk melakukan pengukuran menggunakan pita pengukur laser modern. Instrumen ini juga disebut "pengukur jarak laser". Prinsip kerjanya sederhana: Anda perlu memasang pita pengukur di titik awal pengukuran dan mengarahkan sinar ke titik jarak yang ingin Anda ukur. Umpan balik yang bagus tentang perangkat murah namun berkualitas tinggi LEICA Disto D2 dan Mettro CONDTROL 60.

Penentuan jumlah panel pelapis untuk atap pelana segitiga
- Ukur alas (garis horizontal bawah) pedimen segitiga. Mereka mendapat peringkat “A”.
- Ukur tingginya: proyeksikan titik sudut segitiga ke alasnya dan ukur jarak antara kedua titik tersebut. Mereka mendapat nilai “B”.
- Carilah luas pedimen dengan rumus berikut: ½ A x B.
- Bagilah luas atap pelana dengan luas salah satu panel berpihak. Sebuah nomor diperoleh yang menunjukkan jumlah panel yang dibutuhkan untuk kelongsong. Semua perhitungan dilakukan dalam m2.
Contoh perhitungan.
Alas pedimen 3,45 m, tinggi 3,8 m, luas satu panel 0,732 m2.
- Kita hitung luas pedimen segitiga: x 3,45 m x 3,8 m = 6,55 m2.
- Kami menghitung jumlah panel yang dibutuhkan: 6,55 m2: 0,732 m2 = 8,948. Kita bulatkan, kita mendapat 89,5. Ini adalah jumlah panel dinding yang diperlukan untuk menutupi atap pelana yang panjangnya 3,45 m dan tinggi 3,8 m.
Penentuan jumlah panel berpihak untuk atap pelana trapesium

- Ukur panjang alas atap pelana (b).
- Ukur panjang garis horizontal atas atap (a).
- Ukur tinggi pedimen: proyeksikan titik patah atap ke alas dan hitung jarak antara kedua titik tersebut (h).
- Hitung luas trapesium menggunakan rumus: ½ x (a+b) x jam.
- Bagilah gambar yang dihasilkan dengan luas satu panel.
Contoh perhitungan:
- b = 6 m;
- a = 3 m;
- jam = 1,8 m.
½ x (6+3) x 1,8 = 8,1 m2
8,1 m2: 0,732 m2 = 11,06
Kami menemukan bahwa 110,6 panel berpihak diperlukan untuk menutupi pedimen trapesium dengan ukuran ini.
Penentuan jumlah panel dinding untuk atap pelana dengan bentuk arsitektur yang kompleks

Untuk mengetahui konsumsi material untuk finishing atap pelana kompleks dengan jendela, tonjolan dan perbedaan ketinggian, perlu dilakukan serangkaian pengukuran untuk setiap elemen struktur.
- Pertama-tama, cari tahu luas bukaan jendela. Untuk melakukan ini, ukur panjang dan tingginya.
- Setelah itu indikator-indikator ini dikalikan.
- Catat nilai yang dihasilkan.
- Lakukan hal yang sama dengan semua jendela di pedimen.
- Tahap terakhir adalah penjumlahan dari indikator yang diperoleh. Ini akan menjadi total luas semua jendela.
Untuk melakukan perhitungan tahap selanjutnya, Anda perlu menggambar gambar pedimen dadakan di selembar kertas. Selanjutnya, Anda perlu memecah bentuk kompleksnya menjadi beberapa bentuk sederhana: segitiga dan persegi panjang. Setelah itu mereka mulai melakukan pengukuran pada masing-masing gambar. Semua indikator yang diperoleh dicatat dalam gambar.
Tahap selanjutnya adalah menghitung luas pedimen. Karena terdiri dari beberapa bentuk sederhana, pertama-tama tentukan luas masing-masingnya. Setelah itu, nilai yang diperoleh dijumlahkan. Dapatkan indikator yang diperlukan: area pedimen bentuk yang kompleks.
Selanjutnya, dari gambar ini Anda perlu mengurangi total luas bukaan jendela yang diperoleh pada pekerjaan tahap pertama. Hasilnya, area yang akan ditutup dengan pelapis dinding akan ditemukan. Setelah itu akan mudah untuk menghitung jumlah panel yang dibutuhkan untuk menyelesaikan tugas ini. Prosesnya mirip dengan yang dijelaskan pada bagian atap pelana segitiga dan trapesium.
Penentuan jumlah bahan untuk menutupi atap dan atap pelana

Overhang adalah bagian atap yang menonjol melebihi bidang dinding rumah. Bagian horizontal dari proyeksi ini disebut “eave overhang”. Vertikal – “pedimental”. Keduanya ditutupi dengan lampu sorot. Ujungnya ditutup dengan tali J dan/atau tepi tetesan. Untuk menentukan jumlah bahan yang dibutuhkan, Anda perlu melakukan beberapa tugas secara berurutan:
- ukur panjang atap yang menjorok;
- ukur lebar atap yang menjorok (bagian yang menonjol di luar pedimen);
- semua indikator yang diperoleh dari hasil pengukuran harus diubah menjadi meter linier;
- Selanjutnya, Anda perlu mencari luas total atap yang menjorok, secara bergantian menghitung luas setiap tonjolan;
- Prosedur serupa dilakukan untuk atap pelana yang menjorok.
Hasilnya, akan ditemukan total luas atap yang menjorok yang akan ditutup dengan lampu sorot. Selanjutnya cari luas satu panel soffit dan panjang profil J pada kumpulan komponen merk bahan finishing yang dipilih. Dengan analogi perhitungan sebelumnya, jumlah material yang dibutuhkan untuk pekerjaan finishing ditemukan.

Aturan dan fitur koneksi elemen tambahan untuk kelongsong atap pelana
Komponen-komponen tersebut diperlukan untuk memastikan kemudahan pemasangan panel dinding dan memberikan tampilan akhir pada rumah. Jika pedimen memiliki bentuk arsitektur yang kompleks, untuk kelongsong yang jumlah elemen tambahan standarnya tidak cukup, bagian yang hilang dapat dipesan. Semua produsen bahan ini menawarkan layanan pembuatan panel dan komponen sesuai dengan sketsa dan dimensi pelanggan.
Setiap elemen pelapis tambahan dilengkapi dengan strip berlubang yang terletak di satu sisi produk. Kalau tidak, elemen ini disebut "strip kuku". Ini dimaksudkan untuk memasang alat kelengkapan ke permukaan penahan beban.

Untuk menghubungkan elemen finishing satu sama lain, apa yang disebut "kunci" digunakan: tonjolan berbentuk di sisi produk yang berlawanan dengan strip berlubang. Kunci dari elemen yang berbeda memiliki bentuk yang berbeda. Hal ini diperlukan untuk memastikan sambungan panel finishing dengan kualitas terbaik.

Jadi, saat memasang pelapis dinding, mereka menghasilkan bunyi klik yang khas, menandakan bahwa kedua bagian telah terhubung dengan benar. Saat menghadapi bukaan jendela dan pintu, metode penyambungan komponen yang lain digunakan: tonjolan salah satu komponen dimasukkan ke dalam ceruk yang sesuai dengan komponen lainnya. Saat melakukan pekerjaan ini, tidak diperlukan penyambungan yang paling rapat.

Pemasangan pelapis dinding yang benar memerlukan penerapan beberapa aturan sederhana namun wajib.
- Saat memasang panel dan komponen ke permukaan penahan beban, Anda harus mencoba memasang sekrup ke tengah lubang pada strip paku.
- Anda tidak dapat mengencangkan panel dengan sekrup sadap sendiri sehingga panel tersebut bersentuhan maksimal dengan tepi selubung. Menurut aturan pemasangan, harus ada celah kecil dengan lebar minimal 1 mm, tetapi tidak lebih dari 1,5 mm, antara kepala sekrup dan strip paku. Persyaratan ini terkait dengan kebutuhan untuk memastikan material “bergerak bebas” di bawah pengaruh gaya ekspansi dan kompresi.
- Semua produk dipasang ke dinding hanya melalui lubang pada strip kuku.
- Saat memasang elemen yang berdekatan, perlu untuk memotong strip paku salah satunya sehingga terbentuk celah selebar minimal 5 mm.
- Pengencang galvanis digunakan untuk memasang pelapis dinding vinil dan logam.

Alat yang dibutuhkan untuk memihak atap pelana
Karena pedimen merupakan bagian atas bangunan, maka pekerjaan harus dilakukan pada ketinggian. Oleh karena itu, pertama-tama Anda perlu menjaga ketersediaan tangga yang tahan lama. Minimal diperlukan dua tangga, karena ini akan menghilangkan pergerakan konstan satu tangga dari satu sudut rumah ke sudut lainnya. Pilihan terbaik– penataan jalan setapak yang dapat dilalui seseorang saat melakukan pekerjaan.


Penting untuk memilih alat yang paling nyaman untuk memotong dinding. Ada tiga opsi untuk menyelesaikan tugas ini:

Harga model puzzle populer
Gergaji ukir
Semua alat ini memungkinkan Anda mendapatkan potongan yang rata tanpa goresan. Setiap master memilih sendiri metode pengerjaan dengan materi yang paling nyaman dan mudah diakses olehnya.


Untuk menandai panel dan komponen, Anda memerlukan pensil sederhana dan kotak logam. Pita pengukur diperlukan untuk melakukan pengukuran. Salah satu yang paling banyak alat yang tepat– tingkat gelembung konstruksi. Para ahli merekomendasikan untuk memilih model profesional, karena dengan bantuannya Anda dapat menentukan horizontal dan vertikal dengan paling akurat.

Dari alat bantu Anda dapat mempersiapkan hal berikut:
- garis tegak lurus;
- Tang;
- Palu;
- palu karet atau kayu;
- penanda.

Untuk memasang sekrup self-sapping galvanis, obeng bertenaga baterai adalah pilihan yang paling nyaman. Itu tidak “terikat” dengan jaringan listrik, sehingga tidak memerlukan berbagai jenis pembawa dan kabel. Pilihan terbaik– obeng dengan dua baterai yang dapat diganti. Memiliki baterai tambahan akan memungkinkan Anda menghindari gangguan dalam pekerjaan yang diperlukan untuk mengisi ulang baterai yang mati.

Harga obeng model populer
Obeng
Cara memasang bingkai di bawah dinding dengan benar
Pelapis dinding merek apa pun dan bahan apa pun (semen asbes, logam, atau vinil) tidak dapat dipasang langsung di dinding. Pertama, Anda perlu menyiapkan bingkai, yang juga disebut "selubung". Ini dapat dilakukan dengan menggunakan dua jenis bahan: balok kayu atau profil logam, yang dimaksudkan untuk pemasangan drywall.

Ini tidak berarti bahwa salah satu bahan lebih baik dari yang lain. Keduanya cocok untuk membuat rangka yang kuat dan tahan lama. Namun kayu masih memiliki satu kelemahan: memerlukan pengeringan yang hati-hati. Jika tidak, selubung pasti akan bergerak dan deformasi struktur yang menghadap mungkin terjadi. Risiko terjadinya masalah ini sangat tinggi ketika bekerja dengan pelapis dinding vinil fleksibel.

Penampang balok kayu harus menyerupai penampang profil logam. Ukuran berikut ini cocok: 30/40 mm, 35/45 mm, 40/40 mm, 45/45 mm, 40/50 mm, 40/60 mm, dll. Paling sering, profil logam PP 60/27 dipilih untuk konstruksi rangka. Ini, seperti balok kayu, akan berfungsi sebagai tiang penahan beban.

Selain elemen utama desain ini, Anda memerlukan elemen tambahan: suspensi. Ini adalah pelat tipis khusus dengan perforasi yang digunakan untuk menyelaraskan tiang bingkai dalam satu bidang. Dengan cara ini Anda mendapatkan dinding vertikal yang sangat halus.

Gantungan dipasang pada permukaan penahan beban melalui lubang yang terletak di tengah pelat. Kemudian strip berlubang dilipat kembali dan tiang bingkai dimasukkan di antara keduanya. Pengikatan dilakukan menggunakan sekrup kecil sadap sendiri SMM 3.5/51. Pengencang lain yang cocok untuk tujuan ini dapat digunakan. Untuk membuat rangka dari balok kayu, Anda membutuhkan sekrup kayu sepanjang 1,5-2,5 cm.
Aturan untuk memasang bingkai di bawah dinding
- Gantungan dipasang sedemikian rupa sehingga jarak antar gantungan tidak melebihi 60 cm.
- Jarak gantungan atas dan bawah tidak boleh lebih dari 15 cm dari tepi dinding dan tidak lebih dekat dari 5 cm.
- Jika balok kayu digunakan, persiapannya diperlukan: pengeringan berkualitas tinggi dan pelapisan dengan larutan ogebioprotektif.
- Jarak antara tiang rangka penyangga harus sesuai dengan lebar insulasi yang dipasang. Optimal – 50-60 cm.
- Untuk permukaan bata, Anda perlu mengebor lubang terlebih dahulu untuk gantungan. Pertama, mereka memberi tanda yang sesuai di dinding, setelah itu mereka menyelesaikan tugas menggunakan bor dan mata bor dengan pobedite.


Pekerjaan persiapan
Awal pekerjaan pemasangan selubung - persiapan atap pelana dan atap yang menjorok.
Langkah 1. Pertama-tama, lepaskan bahan finishing lama: papan angin, pasang surut, kelongsong. Untuk melakukan tugas ini, gunakan alat apa pun yang mudah digunakan: batang pengungkit, palu, tang.

Langkah 2. Bahan atap potong rata dengan atap pelana yang menggantung. Pilih alat yang sesuai dengan bahan atap. Jika ubin logam, gunakan penggiling dengan lingkaran logam. Jika terbuat dari batu tulis, Anda memerlukan palu, penggiling dengan cakram batu, dan pemotong kawat. Jika tonjolan atau serpihan yang tidak rata tetap ada setelah pemangkasan, jangan khawatir: selanjutnya akan ditutup dengan elemen finishing: tepian menetes.

Langkah 3. Mereka melakukan semua yang diperlukan untuk meratakan dinding dan overhang: menghapus atau menebang semua bagian yang menonjol yang dapat dilepas tanpa konsekuensi bencana bagi bangunan.


Pediment sebelum finishing - foto
Pemukulan pesawat pedimen

Langkah 1: Pasang Rel Bawah
Untuk menentukan bidang kulit, level laser adalah yang paling nyaman. Alat ini dipasang pada titik terendah salah satu sudut pedimen dan mengarahkan sinar ke arahnya sisi yang berlawanan. Penting untuk memasang perangkat agar pesawat baru berada jauh darinya dinding penahan beban tidak kurang dari 4 cm Saat menyalakan perangkat, buat tanda pada titik-titik yang ditunjukkan oleh laser.

Untuk membuat pesawat baru menggunakan batangan dan peralatan yang tersedia, lakukan sebagai berikut:

Langkah 2: Temukan Rel Atas
Terlepas dari apakah pedimennya berbentuk segitiga atau trapesium, pemasangan rel atas dimulai dengan memotong ujung-ujungnya pada sudut 45°. Untuk melakukan ini, gunakan gergaji mitra, gergaji ukir, atau gergaji besi.

Selanjutnya, Anda perlu mencari lokasi yang tepat untuk memasang panduan atas. Untuk melakukan tugas ini, Anda memerlukan garis tegak lurus pada seutas benang yang panjangnya cukup untuk menyentuh beban dengan pemandu bawah. Jika ketinggian pedimennya signifikan, Anda perlu mencari asisten. Orang ini akan berada di pemandu paling bawah dan menentukan apakah garis tegak lurus telah menyentuhnya.
Pengurutan:
- dari titik perpotongan balok punggungan dengan dinding pedimen, ukur jarak yang sama dengan lebar lekukan dari dinding pemandu bawah (dari dinding ke bidang luar palang);
- beri tanda dengan spidol;
- terapkan utas ke titik ini, di mana garis tegak lurus dipasang;
- tanyakan kepada asisten apakah beban telah bersentuhan dengan bidang luar pemandu bawah;
- gerakkan benang secara bertahap, temukan titik di mana garis tegak lurus akan menunjukkan bahwa garis vertikal telah ditemukan;
- buat tanda yang sesuai dengan spidol.
Jika pedimen berbentuk trapesium, pekerjaan ini dilakukan dua kali, pada setiap perpotongan balok atap dengan dinding.
Langkah 3: Memasang Rel Atas
Sekrup sadap sendiri disekrup menjadi batangan dengan ujung dipotong pada sudut 45° sehingga ujungnya menonjol dari sisi sebaliknya batang sebesar 5-7 mm. Pada titik-titik yang ditemukan menggunakan garis tegak lurus, lubang dibor dan pasak plastik dipasang di dalamnya. Setelah itu panduan atas diperbaiki. Jika perlu, balok punggungan dibatasi dengan balok kayu.
Langkah 4. Memasang rel samping
Sepanjang garis kemiringan atap, perlu dipasang pemandu samping yang terbuat dari bahan yang sama dengan yang sudah diperbaiki. Untuk melakukan ini, Anda perlu mengikir atau memotong ujung jeruji. Karena sudut kemiringan atap bisa berapa saja, tidak mungkin memberikan rekomendasi mengenai sudut pemotongan palang. Parameter ini ditentukan secara eksperimental dengan menerapkan cetakan kayu pada pemandu atas dan bawah.
Selanjutnya, lakukan tindakan yang sama seperti pada tahap sebelumnya: bor lubang di jeruji dan kencangkan sekrup sadap sendiri ke dalamnya. Kemudian pemandu samping dipasang pada atap yang menjorok dan pada pemandu atas dan bawah. Garis besar selubung yang sudah jadi harus berada pada bidang vertikal yang sama.
Pemasangan bingkai di bawah dinding
Langkah 1. Menandai gantungan
Berdasarkan aturan pemasangan selubung di atas, tandai pedimen untuk pemasangan gantungan. Untuk menyelesaikan pekerjaan ini, Anda memerlukan garis tegak lurus, pita pengukur, dan spidol.
- Dari titik sudut di mana pemandu bawah dan atap yang menjorok berpotongan, jarak yang dipilih tergantung pada lebar insulasi dimundurkan. Jika Anda tidak berencana mengisolasi pedimen, maka langkah optimalnya adalah 40-60 cm.
- Beri tanda pada pemandu bawah dengan spidol.
- Sebuah benang dengan garis tegak lurus diterapkan pada pemandu samping yang terletak di dekatnya dan titik kontak beban dengan tanda pada pemandu bawah ditemukan.
- Proyeksikan garis benang ke dinding dan tandai dengan spidol, dengan memperhatikan bahwa bagian atas dan bawah tidak lebih dekat dari 5 cm ke kontur kayu (logam) dari selubung. Jarak antara titik tengah adalah 50-60 cm.
- Dari tanda di panduan bawah, ukur 40-60 cm ke arah sudut berlawanan rumah dan lakukan urutan pekerjaan serupa: dengan menggunakan garis tegak lurus, temukan garis vertikal dan tandai dengan spidol di sepanjang garis ini.
- Dengan cara ini, seluruh area pedimen ditandai.

Di hadapan bukaan jendela atau pintu, penandaan dilakukan dengan mempertimbangkan bahwa gantungan harus ditempatkan di sekeliling elemen pedimen ini, tetapi dengan mempertimbangkan sudut kemiringan yang diinginkan. Ini akan memungkinkan Anda membuat lapisan bukaan berkualitas tinggi.
Langkah 2. Mempersiapkan lubang untuk memasang gantungan

Harga model bor palu populer
Palu
Pada tahap pembuatan rangka untuk pelapis dinding ini, perlu untuk mengebor lubang yang akan digunakan untuk memasang gantungan ke pedimen. Pilihan bahan dan alat tergantung dari bahan apa pedimen itu dibuat. Jika terbuat dari batu bata, Anda memerlukan bor (optimal dengan mode bor palu), mata bor dengan pobedit, paku kayu, dan paku. Jika terbuat dari kayu, balok busa, atau balok gas, obeng dan sekrup sadap sendiri sudah cukup.
Langkah 3. Pemasangan gantungan
Pengikatan gantungan dilakukan menggunakan obeng dan sekrup sadap sendiri sepanjang 3,5-4,5 cm dengan kepala rata dan lebar. Setiap strip logam diaplikasikan pada dinding sehingga (strip) horizontal. Terdapat lubang lonjong di bagian tengah suspensi. Bagian tengahnya sejajar dengan tanda pada pedimen. Pasang sekrup sadap sendiri dan pasang strip logam ke dinding.


Langkah 4. Pemasangan tiang rangka penyangga


Langkah 5. Pemasangan selubung atap yang menjorok
Untuk melapisi bidang bagian dalam atap yang menjorok, sepanjang garis lereng harus dibatasi dengan palang setebal 3-4 cm, bilah kayu dipasang pada sudut dalam, dibentuk oleh persimpangan overhang dengan pedimen, dan di sepanjang garis overhang di sudut luar yang berlawanan.
Karena lampu sorot tahan terhadap tekukan dan ringan, jarak antar jeruji diperbolehkan hingga 80 cm, namun overhang dengan lebar seperti itu cukup jarang terjadi. Pada tahap pekerjaan ini perlu dipastikan bahwa ujung luar selubung membentuk garis rata mengikuti potongan kemiringan atap.

Harga untuk berbagai jenis batangan
Menutupi bukaan jendela dan pintu
Ada beberapa pilihan untuk finishing bukaan jendela dan pintu. Pilihan metode optimal tergantung pada apakah pemasangan pasang surut diperlukan, dan pada karakteristik komponen dari pabrikan tertentu. Namun prinsip dasar pemasangan elemen finishing sama untuk semua jenis pelapis dinding.
Jendela pada atap pelana paling sering terletak pada bidang yang sama dengan dinding. Oleh karena itu, pemasangan pasang surut tidak diperlukan. Lebar panel samping strip jendela cukup untuk menutupi bukaan yang dangkal. Untuk menutupinya, Anda perlu melakukan beberapa tahapan pekerjaan secara berurutan.


Langkah 1. Melakukan pengukuran
Pita pengukur digunakan untuk melakukan pengukuran. Indikator yang diperoleh dicatat pada selembar kertas. Anda perlu mengetahui parameter berikut:
- ketinggian garis dalam bukaan;
- ketinggian garis luar bukaan;
- kedalaman bukaan (lebar lereng);
- sudut kemiringan bukaan.
Langkah 2. Persiapan elemen finishing
Sesuai dengan dimensi yang diperoleh, strip jendela dan profil J dipotong. Yang paling tugas yang sulit– potong dengan benar semua tonjolan yang, ketika menggabungkan dua strip dekat jendela, membentuk sudut dalam dan luar lereng.
Profil elemen tambahan ini (strip dekat jendela) cukup rumit, sehingga Anda harus berulang kali memotong satu atau beberapa bagian ujungnya setelah pemasangan. Disarankan untuk memotong sedikit strip dekat jendela dari seluruh kanvas ukuran lebih besar daripada tinggi bukaan. Setelah mendapatkan potongan ujung yang berkualitas tinggi, panel dapat dipersingkat.
Langkah 3. Pemasangan profil-J
Profil J dipasang di sekeliling jendela sehingga potongan paku berada pada bidang lereng. Untuk pemasangan, sekrup sadap sendiri digunakan, yang disekrup ke batang (profil logam) selubung.
Langkah 4. Pemasangan strip jendela
Strip dekat jendela dipasang sehingga tonjolan berpola menutupi sudut luar lereng. Bagian datar panel dimasukkan ke dalam profil-J. Potongan paku dari profil jendela melekat pada selubung. Ujung panel berpihak akan dimasukkan ke dalam ceruk elemen tambahan ini, yang akan menutupi semua titik pengikat.


Membingkai jendela melengkung dan bundar
Menutupi atap pelana dengan memihak
Urutan tindakan pemasangan pelapis dinding bergantung pada beberapa faktor. Pertama, Anda perlu mempertimbangkan apakah rangkaian pekerjaan akan dilakukan secara mandiri atau dengan bantuan asisten. Kedua, titik penting seperti adanya kemiringan yang lebih rendah (air surut) di pedimen. Jika belum ada, pengerjaan pelapisan pada pedimen merupakan kelanjutan dari finishing dinding rumah dengan pelapis dinding. Dalam hal ini, pemasangan bilah awal tidak diperlukan.
Jika pedimen memiliki kemiringan yang lebih rendah dan pekerjaan dilakukan sendiri, disarankan untuk melakukan sedikit persiapan sebelum memulai pemasangan struktur hadap. Hal ini akan mengurangi kerumitan dalam mengencangkan panel batang awal yang panjang dan fleksibel, karena tidak akan ada orang yang memegang ujung keduanya.
Jika situasinya seperti ini, sekrup sadap sendiri disekrupkan setengahnya ke ujung luar bawah pemandu rangka bawah sehingga berada pada jarak 40-50 cm satu sama lain. Anda harus meletakkan palang awal pada mereka. Setelah itu, dapat diperbaiki tanpa banyak kesulitan.
Harga berpihak
Urutan pekerjaan pemasangan dinding
Langkah 1. Pemasangan strip akhir
Sepanjang garis kemiringan atap, strip finishing dipasang pada rel samping. Kedua garis profil ini akan berpotongan di titik pojok atas pedimen segitiga. Oleh karena itu, ujung setiap papan harus dipotong miring agar diperoleh sambungan yang indah dan rata.
Jika pedimen berbentuk trapesium, strip akhir dipasang hanya di sepanjang rel samping, membiarkan bagian atasnya bebas.


Langkah 2. Bersiap untuk memperbaiki bilah awal
Jika pemandu bawah bingkai tidak rata sempurna, kencangkan ulir sebelum memasang profil awal. Ini akan berfungsi sebagai panduan untuk mengatur bilah awal. Benang harus diregangkan secara horizontal. Hal ini dicapai dengan menggunakan tingkat bangunan.
Langkah 3. Memasang bilah awal
Strip awal diletakkan di atas seutas benang dan salah satu ujung elemen tambahan ini dimasukkan ke dalam strip akhir yang berdekatan. Harus ada jarak 2-3 mm antara bagian finishing ini. Ini akan memberikan celah redaman yang diperlukan untuk mengimbangi “gerakan” bilah saat dipanaskan atau didinginkan.
Selanjutnya, mereka mulai memasang profil awal melalui lubang pada strip paku. Sekrup sadap sendiri digunakan, yang disekrup sehingga strip bergerak bebas secara horizontal di dalam lubang perforasi. Tapi itu melekat erat.
Profil awal berikutnya dipasang pada jarak 5-6 mm dari yang pertama. Dengan cara ini mereka bergerak di sepanjang garis pedimen. Strip terakhir dipotong menggunakan gunting logam, sedikit ditekuk ke arah Anda dan ujungnya dimasukkan ke dalam strip finishing.


Langkah 2. Pemasangan panel berpihak pertama
Di bagian bawah setiap panel dinding terdapat lekukan berbentuk U yang digunakan untuk menyambung kedua bilah. Pada bilah awal Ada ceruk di mana Anda perlu memasukkan panel berpihak. Setelah itu ditarik sedikit ke atas dan diamankan melalui lubang pada strip paku dengan sekrup sadap sendiri ke tiang bingkai.
Dalam pekerjaan ini, penting untuk mengikuti satu aturan: jangan pernah menarik pelapis dinding agar bersentuhan maksimal dengan panel di bawahnya. Perlu ada jarak selebar 2-3 mm di antara keduanya.
Ujung panel berpihak harus dimasukkan ke dalam strip finishing samping. Panel-panel tersebut disambung secara horizontal baik secara tumpang tindih atau menggunakan profil berbentuk H.

Langkah 3. Pemasangan pelapis dinding lebih lanjut

Karena untuk setiap baris panel Anda harus membuat dua potongan di ujungnya dengan sudut tertentu, disarankan untuk membuat templat untuk setiap kemiringan atap. Mereka (templat) dapat dibuat dari bagian-bagian panel, yang salah satu ujungnya harus dipotong miring agar sesuai dengan garis kemiringan salah satu lereng atap.


Di bawah jendela, semuanya hampir sama - strip paling atas dipotong sesuai ukuran dan dipasang ke kunci sisi bawah


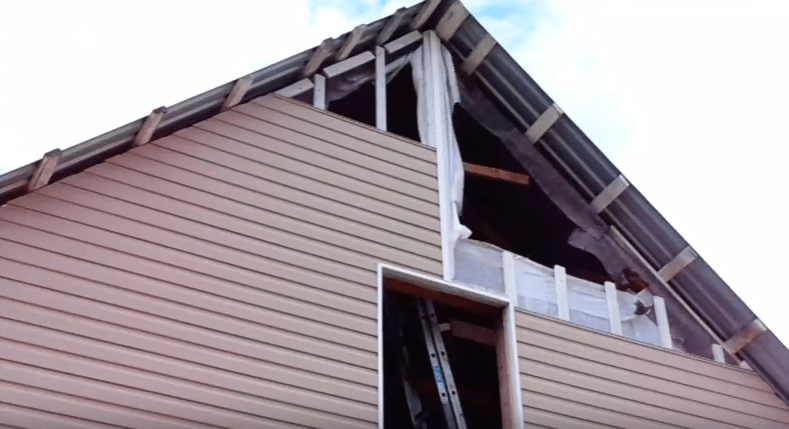
Selanjutnya, templat diletakkan di panel, garis digambar di sepanjang panel, dan bagian ujung dinding yang tidak perlu digergaji di sepanjang panel. Setelah mencapai puncak atap pelana berbentuk segitiga, diperbolehkan memasang panel atas melalui pelapis dinding, dan bukan melalui perforasi.


Satu-satunya saat Anda dapat memasang panel berpihak langsung melalui vinil adalah panel terakhir
Jika pedimen berbentuk trapesium, strip akhir dipasang pada pemandu atas bingkai. Kemudian panel berpihak terakhir dipasang. Mungkin perlu pemangkasan.

Pemasangan lampu sorot
Sistem soffit modern terdiri dari 4 elemen:
- panel soffit dengan perforasi;
- panel soffit tanpa perforasi;
- J-profile (beberapa produsen menyebut produk ini sebagai “strip akhir”);
- jalur penghubung.
Langkah 1. Pemasangan profil-J
Profil J diperlukan untuk menutup ujung dan menahan lampu sorot. Elemen tambahan ini dipasang dengan cara yang sama seperti panel berpihak: melalui perforasi. Tali-J harus ditempatkan di kedua sisi lampu sorot, sehingga dipasang pada sudut bagian dalam yang dibentuk oleh overhang atap dan dinding pelana, serta pada tepi luar atap.
Dua profil J dihubungkan satu sama lain dengan memotong 2-2,5 cm bagian pemasangan (berlubang) pada salah satu papan. Setelah itu papan-papan tersebut disatukan satu sama lain. Di titik sudut overhang, profil-J dihubungkan ujung ke ujung.
Langkah 2. Pemasangan lampu sorot


Harga berbagai jenis lampu sorot
Lampu sorot atap
Lampu sorot cukup fleksibel dan ringan, sehingga pemasangannya sederhana. Panel sedikit ditekuk ke bawah dan kedua ujungnya dimasukkan ke dalam ceruk di papan-J. Tindakan lebih lanjut tergantung pada konfigurasi atap yang menjorok dan topografi pedimen.
Jika berbentuk segitiga, pasang lampu sorot dan kencangkan dengan cara yang sama seperti saat memasang panel dinding. Jika kedua lampu sorot tersambung dengan benar, bunyi klik yang khas akan terdengar. Berkat kuncinya, panel-panelnya terhubung erat satu sama lain. Namun di sini juga, Anda harus mengikuti aturan yang sama seperti saat memasang pelapis dinding: sisakan celah selebar 2-3 mm di antara elemen finishing.


Jika pedimen berbentuk trapesium atau lebih rumit, strip penghubung dipasang pada titik kekusutan dan belokan. Dengan bantuan mereka, garis soffit digabungkan. Tahap akhir pekerjaan adalah pemasangan pipa tetes. Mereka melekat pada tepi luar lereng atap.


Video - Cara menutupi atap pelana dengan pelapis dinding bagian 1. Rahasia pemasangan pelapis dinding
Video - Cara menutupi atap pelana dengan pelapis dinding, bagian 2. Rahasia pemasangan pelapis dinding
Video - Kelongsong pedimen